Snickerdoodle Cookies

Have Snickerdoodlesyou ever had a snickerdoodle cookie before? Not just a sugar cookie rolled in cinnamon and sugar, but the kind with the little ‘bite’ to it? A slight tang you can’t quite identify? Those would be the delicacies that originated in Germany. My Grandma made these cookies every year for Christmas. Today, I am sharing our family recipe, including my Grandma’s secret ingredient, with you! Enjoy!

Snickerdoodle Cookies

1 cup butter, softened

1 1/2 cups sugar

2 eggs

2 3/4 cups flour

2 teaspoons cream of tartar

1 teaspoon baking soda

1/2 teaspoon salt

~~~~~~

2 Tablespoons sugar

2 teaspoons cinnamon

Dash allspice


Mix butter, sugar and eggs until fluffy.

Sift together flour, cream of tartar, baking soda, and salt. Mix, thoroughly, into wet ingredients.

Chill in refrigerator for at least 1 hour. Preheat oven to 400 degrees.

Roll dough into balls the size of small walnuts (about 1″ in diameter.)

Mix extra sugar, cinnamon, and allspice in small bowl.

Roll dough balls in mixture, until fully covered, and place on ungreased cookie sheet, about 2″ apart.

Bake 8-10 minutes, or until lightly browned but soft. Cool for 2 minutes on pan, then transfer to cooling rack.

Chicken and Matzo Ball Soup

I grew up without a regular religious routine. I know that may seem strange and shocking to many of you, but it seemed like the freedom to explore religion in general to me. As I went to different cultural and religious ceremonies throughout the years, I became curious about the differences…and similarities. I’m not here to debate which religion is the best or most right. I don’t have all the answers. I do, however, have my own opinions based on learning and experience. I will say that all religions have at least one thing about them that strikes me as being true.

That being said, part of learning about culture, heritage, and religion is experiencing the traditional foods. This has always been, of course, my favorite part. You really learn a lot when you examine the food that defines a group of people. The history that is passed down with a recipe is often overlooked in the wake of tradition. However, using what was available to feed those you care about, has always been the basis of family.

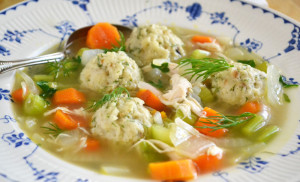
2013-03-20-r-dilled-matzo-ball-soup

My Step-Dad’s family is Jewish. I grew up enjoying latkes, kugel, bagels, and matzo ball soup. Eventually I moved to San Francisco. After growing up in a small town, the big city was exciting! So many amazing restaurants to try! Most of my favorite places were, and still are, little hole-in-the-wall dives. Literally. There are so many buildings crammed into that one area that they usually share walls and seem like one big building from block to block. The spaces run lengthwise from the street back and always feel narrow. But, that’s part of the charm. You can find the really authentic food at the small places too. There was a Jewish deli that I would visit as often as I could get to that neighborhood, and I always had to get a knish. Just thinking about them makes my mouth water.

Every once in a while, I would visit the more upscale, and expensive, eateries. Blissfully savoring each morsel, trying to lock each flavor into my memory. Yes, they really were that good. I really learned to appreciate food then. Not just for sustenance, but as the creation of a memory. I think that’s why I love cooking and baking so much. Creating taste sensations that strikes an emotion. OK…now, I’m thinking of the scenes in ‘Ratatouille’ where Remy shows his brother how different flavors mixed together  an create something magical. That’s how it feels when someone loves something you have made. Though, it’s not easy to come up with a truly unique recipe all the time, taking an existing recipe and making it unique is pretty fun! Sometimes, I find shortcuts to make my life easier, without sacrificing quality, or substitutions that take the recipe to a whole new level. Especially healthier options!

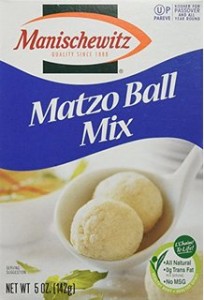
Once I found the kosher aisle in the grocery, I realized that I could easily make chicken soup at home and use the handy-dandy matzo ball mix to make the star of the dish! Life just got easier…and more delicious! Eventually, I had a child of my own, and one time we ended up with a massive cold we kept passing around like a hot potato. In my fevered need to make us chicken soup, I also found that some stores have pre-chopped vegetables. When you are sick yourself, it’s like finding the proverbial pot of gold! If your vegetables are still raw, I suggest sautéing then in a little oil before adding the broth. These days, I use pre-cut frozen veggies (usually my own celery, carrots, onions, and garlic) and those handy cartons of broth. There are also some excellent concentrates, but even a powdered chicken broth will work. It really depends on your preference and budget. Really, you can eat very well on a skimpy income. I also add a chicken breast or two (you actually don’t need a lot) to the broth while it boils. Both the chicken and the51xTaGWr3jL._AC_UL320_SR218,320_ broth will be enhanced by this process. Sounds pretty easy so far right? Frozen veggies, chicken, and broth in a pot and heat to boiling. Let the chicken cook in the liquid the whole time. Seriously. You really can’t overcook it in the liquid, but do make sure the broth covers it completely. I use Manischewitz for the matzo ball mix. Not only because it is a long-time trusted name in the Jewish community, but also because they sell the matzo ball mix without the powdered broth packet. I make my own soup, so I’d rather have double the matzo mix than a packet I won’t be using. Follow the directions on the box for making the matzo balls. The size is, really, up to you. I tend to make mine small; about 1″ around. This allows them to cook easier as they have a bit more room to move around in the liquid. Whatever size you choose, make them as even as possible so that they all finish at the same time. When the soup is finished cooking, I turn the heat off and remove the chicken into a separate bowl. Then, I take two sturdy, metal, serving forks and shred the chicken meat into tiny slivers. Add the meat back into the pot and stir. Voila! Dinner is ready!

After Thanksgiving (twice,) I knew we would be wanting a lighter meal, and remembered how much we love chicken and matzo ball soup. I always end up making a lot of soup, plus we had leftover pie, so we invited my SIL and her family over for dinner. I have to admit to being a little sneaky here. I just told her that I was making chicken soup. I wasn’t sure how they would react to trying something that sounded so different, and didn’t want the kids to decide ahead of time that they weren’t going to like it. So, I emphasized the pie and didn’t elaborate on the soup. If you have never tried this dish before, they are like dumplings, only lighter and fluffier, as well as seasoned a little more. By the time they got to our house, thanks to a dawdling three-year-old, we were all starving and dug right in! Imagine their faces when even their pickiest eaters loved it! It really is true: you’ll never know what you like, until you try!

Puffed Apple Pancakes

FontCandy (25) There are a few restaurants that serve this breakfast (also known as a German apple pancake), but my memories of this dish are from my Grandma’s house when I was little. Sometimes, she would make a chocolate version! Oddly, the recipe I use was given to me for a gourmet foods class I took in high school. Not a Home Economics class, but an actual cooking class, which I loved.

Though amazingly impressive, it’s actually quite easy to make. For me, the most difficult part is preparing the apples…which really isn’t difficult at all, just time consuming. I highly recommend you try this at least once though, as it is worth every effort!

Depending on the size of the pan (mine is a 10″) the pancake may have a slightly different texture. I have had ones in restaurants that were fairly dense and much more moist. Though good, they tend to make me feel that they aren’t fully cooked. The one I made yesterday, for a birthday brunch for both my son and I, was light and fluffy! I warn you now that you may have to make more than one of these! Though they spread over a platter, you will have lots of requests for more!

Puffed Apple Pancake 

Apple Filling:

3-4 granny smith (green) apples

1/4 cup sugar

1/4 cup butter

1 teaspoon cinnamon

Dash allspice

Dash nutmeg

Pancake:

3 large eggs

3/4 cup milk

3/4 cup flour

1/4 teaspoon salt

1 1/2 – 2 tablespoons butter

Apple Filling Directions:

  1. Peel, core, and slice apples thin.
  2. Melt butter in large pan, add apples, sugar, and spices.
  3. Sauté, stirring frequently, until tender – about 5 to 10 minutes. Set aside until pancake is ready.

Pancake Directions:

  1. Preheat oven to 450 and heat large (oven proof) iron skillet over medium high, until hot but not smoking.
  2. Beat eggs, milk, flour, and salt with mixer until smooth.
  3. Melt butter in pan, tilt to coat pan.
  4. Add batter, quickly tilt pan to spread batter evenly, and place pan in hot oven for 15 minutes. If pancake puffs, you can break it with a fork or knife.
  5. After 15 minutes, turn oven temp down to 350 for an additional 10 minutes.
  6. Remove from oven, slide pancake to serving platter, and top with apple filling. Garnish with powdered sugar, if desired.

The Easiest Spiced Apple Cider

Warm Spiced Apple Cider - One of our favorite fall treats! Great for parties and always enjoyed by trick or treaters (and parents) on cold Halloween nights!

Warm Spiced Apple Cider – One of our favorite fall treats! Great for parties and always enjoyed by trick or treaters (and parents) on cold Halloween nights!

I wanted to share with you the best spiced apple cider recipe ever. It’s so easy you’ll laugh, but tastes like something from a gourmet cooking store (we won’t name any names, but this cider has been compared to the best.) When serving, directly from the slow cooker you make it in, leave the lid off and the heat on low. This keeps it a perfect temp for drinking!

We make this every year for Halloween to give out to those roaming the streets in search of treats. I post a sign on the door letting people know they can ask for a cup, and leave the recycle bin open at the end of the driveway. The delicious smell has been known to affect people standing on the sidewalk! This also makes a wonderful addition to any Fall party. Just be sure to have lots of extra apple juice on hand to keep topping it off throughout the night!

Spiced Apple Cider

Ingredients:

Orange, cut into rounds

Whole cinnamon sticks (1-4)

Whole cloves (4-8)

Apple juice (any kind)

Directions:

Place orange rounds, cinnamon sticks, and cloves (adjust amounts to taste – I usually use two orange rounds, two small cinnamon sticks, and four cloves in a small slow cooker) then add juice up to about an inch from the top. Heat with lid on until hot; a couple of hours. Leave the lid off to serve. When using for a party, leave a ladle and cups next to the slow cooker so everyone can serve themselves.

Breakfast Biscuits with a Healthy Twist

Cheese Bacon BiscuitsBaking from scratch is extremely time consuming, but definitely worth all the effort! Yet, biscuits are one of the easiest breakfast to make. Especially when you have no time in the morning. These cheese and bacon biscuits are light and flaky, even with shreds of sharp cheddar and bacon bits floating throughout each delicate bite. Warm from the oven dripping with butter, they make the perfect accompaniment to eggs. My son also loves to grab them straight from the cupboard for a snack. With all the added preservatives and extras I can never pronounce, I like to make my families’ go-to food as much as possible.

What makes these biscuits healthier? Well, I used turkey bacon and 2% Turkey Baconmilk sharp cheddar cheese in this recipe. Does it make any difference in how the biscuits taste? Really, no. Turkey bacon does have a slightly different flavor, but when it’s cooked up, nice and crispy, and crumbled into tiny bits, we’re talking about total deliciousness! The true test though, is that my pickiest eaters gobble them up.

Cheese & Bacon Biscuits

Ingredients:

9 ounces (1 cup+2 tablespoons) water

2 tablespoons olive oil

1 1/2 teaspoons salt

1 1/2 tablespoons sugar

1/2 cup shredded sharp cheddar cheese (made with 2% milk)

3 cups flour

2 teaspoons dry active yeast

3 tablespoons (turkey) bacon bits

Directions:

*Note: I made my dough in my bread maker. If you have one, I highly recommend using the dough setting to do the hard work of mixing, kneading, and rising. If you don’t have one, here is a wonderful tutorial made by a friend of mine: http://lovefoodies.com/how-to-knead-rise-and-shape-dough.html#.UzgrhNvn9qY

Cut the bacon into small strips (I used scissors to cut the slices directly into the pan.)

Cook while stirring, until crispy and cooked through. Drain on paper towels and set aside.

Crispy BaconAdd each ingredient in order except the bacon. Start the bread maker on the dough setting and set a timer for 35 minutes (into the hour and a half dough timer.) Once the bacon has cooled, break into smaller pieces. At the 35 minute mark, add the bacon bits to the dough.

Once the dough has finished, remove from the bread maker pan onto a floured board. Dough BallsRoll dough into an even shape, cut into small pieces (about 18-20,) and roll each into a ball. Place balls of dough onto a greased pan, cover with a kitchen towel, and let rise 30-40 minutes or until doubled in size.

Preheat oven to 350 and bake for 20-25 minutes or until browned. Don’t worry about the sides (especially if they grew together,) judge by the top color.  Cool on a wire rack. They should last a least a week in a sealed container, but they never last long enough in my house to tell.

Browned Biscuits     Bottom Biscuits

Carnitas is Pork Deliciousness!

Okay, this is a weird one. The ingredients sound strange, but the end result is nothing short of amazing! If you’ve ever had them in a restaurant, this recipe will taste very familiar. The bonus is that you can make this in a crock pot, as the meat should be braised (slow cooked, in some liquid.)

The recipe that I started with, I found standing in line at the grocery store. Those smarties placed a board with the recipe above an open cooler with a bunch of roasts that were SUCH a good deal that it was too hard to resist. Plus, I really like carnitas and had not had it in a while.

WP_20150502_09_30_52_Pro 1

Carnitas Tacos

Ingredients: 

3 1/2 pound pork butt

1 – 12oz can cola

1 onion, peeled and quartered

5 cloves garlic, minced

1 orange

2 tablespoons lime juice

2 teaspoons dried cumin

1 teaspoon dried oregano

2 bay leaves

Salt & pepper, to taste

Directions:

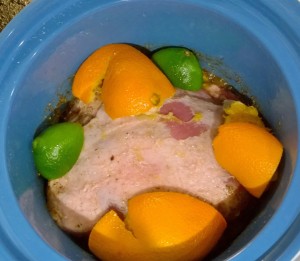
1) Place ingredients in crock pot, cover with spices, lime juice, and cola. Cut orange and squeeze orange and place into crock pot. Cook on high 4-5 hours.

WP_20150504_12_10_21_Pro 1

2) Once pork is cooked tender, strain out solids, and place pork on cutting board [to rest] and pour liquid into a medium pot to simmer for 15 minutes, or until reduced to 1 1/2 cups.

WP_20150504_19_14_02_Pro 1

3) Preheat broiler, trim fat from pork and discard. Cut pork into 1 inch chunks. Mix with reduced liquid and broil on foil lined baking sheet in center rack 5-10 minutes, until browned.

4) Serve hot with your favorite taco fixings.

Serves 8


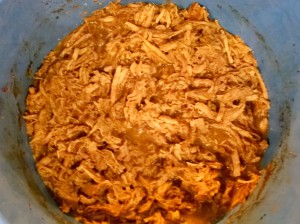
* Some things I did differently were to put the onion and garlic under the pork (to keep the meat off the direct heat source,) use a small lime instead of the lime juice (cut and squeezed onto the meat, like the orange,) shredded the pork (instead of cutting it into chunks,) and skipped the final broiler stage (but mixed the liquid with the meat before serving) as we were too hungry from the smells to wait any longer. Seriously, you have to try this!

Company’s Coming!


Everyone who likes to eat, should know how to cook. Once you have the basics down, it’s a good idea to learn an impressive dish or two for special occasions. Here is a dish that you have probably tasted, or at least heard of, but never thought you could make at home. The first time I tried it, was at a friend’s house. He and his wife were a young family on a tight budget, and this was just something he whipped up while we were standing around their kitchen, watching our kids toddle after the dog, nibbling on snacks, and drinking wine. One of the reasons that I love this dish is the all the wonderful memories attached. Since then, I have tried many recipes for this dish, and eventually melded them into my own–which I now share with you. Enjoy!

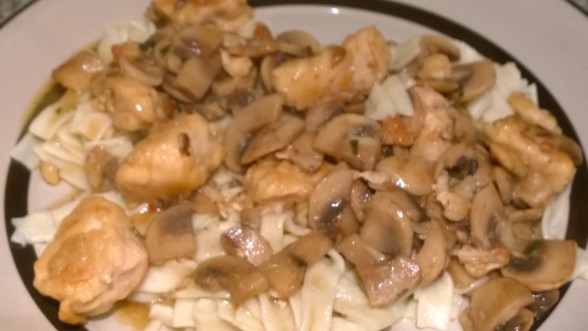
Chicken Marsala

Ingredients:

2 boneless, skinless chicken breasts-pounded thin and cut in halves or pieces

1/2 cup flour (or just enough to coat)

Creole seasoning (or salt & pepper) to taste

1 tablespoon olive oil

4 tablespoons of butter

3 cups sliced mushrooms (white or cremini)

1 1/2 cups Marsala wine

2 cups chicken stock (or broth)

Directions:

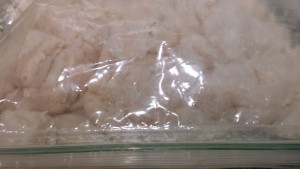
  1. In a plastic (locking) bag, combine flour and seasonings. Add the chicken and shake to coat. WP_20150207_17_17_24_Pro
  2. Heat the oil in a large skillet over medium-high, until hot but not smoking. Add 1 tablespoon of butter until melted, then add the chicken so the sides aren’t touching. Cook until browned on both sides. Remove chicken from the pan and set aside.
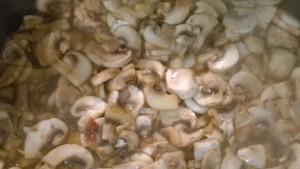
  3. Add 1 more tablespoon of butter to the pan, then add the mushrooms. Cook, stirring frequently, until the mushrooms are browned and have given most of their liquid. WP_20150207_17_56_39_Pro
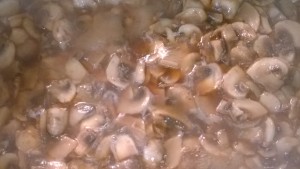
  4. Add the Marsala wine and bring to a boil, scraping to remove any bits of chicken or mushroom stuck to the bottom of the pan. The wine will help with the release of the food. WP_20150207_18_03_52_Pro
  5. When the wine has reduced by half, and the alcohol smell has burned off, add the chicken stock. Boil, stirring occasionally, until the sauce has thickened slightly.
  6. Lower the heat to medium, and return the chicken to the pan. Continue to cook until the chicken is thoroughly cooked and the sauce has thickened enough to coat a spoon. For best results, best to not stir too much in this last stage.
  7. At this point, you can add the last 2 tablespoons of butter, but I have forgotten this part several times with no real difference in taste.

A deliciously rich meal, that won’t break your budget. Perfect for anyone who wants to impress that special someone.

Vegetable Drawer Soup

SP356JEvery once in a while, I notice that my fridge has an abundance of ingredient leftovers. Half a bag of carrots here, the celery leaves in the middle of the stalk, some small potatoes, and all the small amounts of vegetables that didn’t make it into one recipe or another. Instead of letting them go bad, and having to throw them away, I use my Grandma’s method of making soup: start with the basics (carrots, celery, potatoes, onions, and garlic) and add zucchini, yellow squash, broccoli, green beans, corn kernels, and anything that sounds good mixed all together. This is an excellent time to look through your freezer and pantry to see if there are any things there you want to add (such as beans and tomatoes.) This makes for a different soup each time. Since you’ll be using ingredients you have available, they should be items you already like. Win-Win!

I start by chopping all the vegetables to about the same size. I like a small-bite size (think little kid size), so that the soup cooks evenly. For ease, use a slicer on as many veggies as possible. There will be differences, like corn nibblets and flat slices, but that just adds some different textures to the dish. Frankly, having some of the veggies melt in your mouth, is a goal of mine with this soup.

Once all the veggies are cut and ready, I heat a couple of tablespoons of butter or olive oil in a pan and add the minced garlic and chopped onions. To be fair, you really don’t have to cook the onions (especially if they are sweet onions) but it does help them get a rich flavor. After a few minutes, when the onions are translucent, add some tomato paste. I learned a long time ago that tomato paste loses that sour bite when you cook it for a few minutes. If you didn’t know about this trick already, it works with all recipes requiring paste. My twist on this procedure, is to push the garlic and onions to the sides and place the paste directly on the pan in the middle; don’t be afraid to let it sizzle on the pan. Stir the paste a bit so that all of it gets cooked evenly and the color changes slightly. Stir the garlic and onions into the cooked paste and set aside.

Now, let’s talk spices. Salt and pepper, obviously, are basic staples; but a person could get lost in the many varieties of herbs and spices available. The best part about this soup is that you can adapt it to what you have on hand. Need to use up some of that fancy paprika you once bought? Toss some in there. Parsley, sage, rosemary, thyme? Why not! Often, I will use poultry seasoning. Yup, you heard me right…poultry seasoning! It has a good blend of spices that can add a mellow, unifying flow to the vegetables. As for me, I like to experiment. I added a bit of allspice to the last batch. Another thing I learned about tomato sauce and soup recipes, is that you should add a bit of sugar to counter the acidity.

When you’re ready begin building your crock pot of soup, I suggest starting with the potatoes and other chunks of dense veggies. You’ll want these to be closer to the heat source so that they cook more thoroughly. Next, add the other raw vegetables by thickness, the warm paste mix, a can of diced tomatoes (if not adding raw) and any other canned items, finally ending with any frozen pieces.

To go full veggie, use a vegetable stock or broth as your liquid. Personally, I like to use chicken as my base. Next time, I might even throw some chicken in there to shred before serving. You can even use plain water. Whatever you decide to use, add enough liquid to fill the slow cooker so that most of the vegetables are submerged. The amounts used in this dish are flexible, so you will have to experiment a bit to see what works for you. For us, that’s all part of the fun…experimenting!

C__Data_Users_DefApps_AppData_INTERNETEXPLORER_Temp_Saved Images_1454611_10205978183077574_6727975200734747882_n

Now, once again, the hard part. Waiting while it cooks. I suggest at least 8 hours on low, but it can easily cook all day or all night. Trust me, you can be gone all day, and it will just be more melt-in-your-mouth delicious! Last time the potatoes didn’t quite get cooked enough, so I put it back on the heat overnight and it was perfect by morning. Of course, my Grandma used to cook it in a pot on the stove…and you can too! Just be sure to stir often, as this is an all-day dish that is well worth the effort.

Candyland

Ever wish you could make candy? Sounds like a dream, huh? Well, you can. I’m going to show you how.

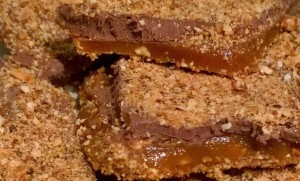
There are many kinds of candy. Just before the holidays last year, I was looking around for something different to give out as gifts. After wallowing in the sea of recipes available online, I settled on an almond toffee. Purported to be like the golf foil wrapped sweets that your Grandma always had a pink tub of, and I loved, I couldn’t wait to try it. This recipe won’t get you the little cubed rectangles, but the taste is so delicious that you won’t mind…and neither will anyone else!
WP_20141222_17_35_05_Pro 3

Also known as “Better Than Almond Roca Toffee”

Before you begin the actual cooking process, do yourself a favor and gather all the equipment and prepared ingredients you need. Trust me, this simple step is important to getting any recipe right. If you don’t have a jellyroll pan, candy thermometer, or sauce pan with high sides (like these examples*), I suggest you wait until you have these items available before you attempt to make this treat. Another thing I like to use when cooking and baking are silicone spatulas. They stand up well to high heat, move the food around efficiently, and are easy to scrape excess candy and chocolate off of in a hurry.

Once you’ve gotten your equipment together (including a microwavable safe bowl, teaspoon, and heavy duty aluminum foil,) you’ll want to make sure you have all your ingredients on hand and ready to use. Why is this so important, you ask? Well, not only does it ensure you have all the ingredients you need, but you will be able to move from step to step without stopping to look for or prepare the next item. I cannot tell you how many recipes I have nearly, or completely, ruined by not being fully prepared before beginning.

Ingredients:

2-3 cups chopped almonds (about 16 ounces whole almonds, roasted and chopped)

16 oz. light brown sugar (small package)

1 pound butter (4 sticks)

24 oz. chocolate chips (2 bags)

Let me pause for a moment to talk about the almonds. When I was shopping for the ingredients that first time, I couldn’t find package of unsalted, roasted almonds available at the store (this was during the holidays, after all) and didn’t want to wait until the farmer’s market day in our area. I refused to use salted ones, and the only other type I could find were raw almonds. “How hard could roasting almonds be?” I thought and threw the bag in my cart. Boy was I right! Not only that, but roasting the almonds yourself is an amazing experience! This is the method I used for roasting:

http://elanaspantry.com/how-to-roast-almonds/

As for chopping, I just whirled them around in my blender. Yes, much of it pulverized into dust, but that worked out for the best. The chunks give it some grip, but the tiniest particles created a coating for all the nook and crannies in the chocolate.

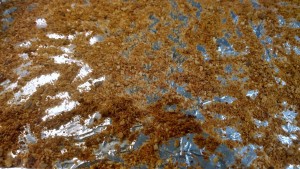
Now, to get cooking! Take your jellyroll pan and cover it in foil. You’ll want a big enough piece to completely cover the pan, including the sides. Carefully smooth the foil over the bottom of the pan, into the corners, and up over the sides. Scoop out about 3/4 to 1 cup of the almonds and spread them evenly in the prepared pan.
WP_20150128_14_33_24_Pro 1

Place the butter in the saucepan, and clip the candy thermometer to the side. When the butter has melted over a med-high heat, add the brown sugar and stir, stir, stir! I’m not kidding, you can leave it alone for a second or two, but realistically you should treat it like an infant. Don’t take your eyes, or hands, off it for a second! The reason you want the high sides on the saucepan is because this boiling candy is HOT and you need to be stirring it constantly. No matter how careful you are, the excess oil from the butter will splash around. My candy thermometer is glass and also gets hot. It also moves around a lot while I am stirring and that can lead to problems getting a correct reading. Ideally, you want the tip to be near the bottom of the pan, but not touching. The solution I came up with is to use a pot holder to keep ahold of the top of the thermometer to keep it in place. Make sure you can see the indicator and numbers!

WP_20150128_14_32_55_Pro

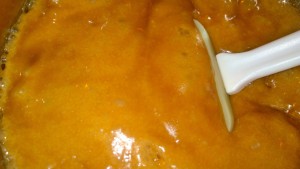
Guess what? It’s caramel!

After about 10-15 minutes of boiling and stirring, your thermometer should read 280 and your toffee should look like this:
WP_20150128_14_35_26_Pro 1

At this point, turn off the heat and continue stirring until the it reaches the golden 290 mark. Quickly unclip the candy thermometer and set aside. I like to scrape the bulk of the molten candy off as I can back into the pan and place the thermometer in a tall, heavy glass filled with hot water. However you do it, you must do it quickly, as the candy will continue cooking while in the pan and start to harden as it cools. Pour the candy the almonds in the pan. The goal is to get the toffee on the pan, don’t worry about spreading it out at this point. Take a second here to really scrape as much of the mixture out of the sauce pan as possible. You won’t get another chance before it hardens. Now you want to smooth it out over the nut pieces and all the way to the edges. Make sure it’s even and fills in each corner. It doesn’t have to be precise and can show bits of almond, as long as it covers the entire bottom of the pan.

WP_20150128_14_48_24_Pro 1

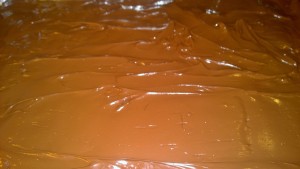
You can now set the pan aside, and put the bowl of chocolate chips and oil into the microwave. Start with 30 seconds, stir, zap another 30 seconds, stir again. Repeat until the chocolate is almost completely melted and stir until totally smooth. Scrape the chocolate into the top of the toffee layer and spread evenly over the candy.

  Chalky chocolate will come out smooth and silky
WP_20150128_14_54_44_Pro 1

Take the rest of the almonds and sprinkle over the chocolate layer. Don’t hold back, pour that stuff on like pixie dust as you will get some back for the next batch when you break it up.

I will admit that this next step is the hardest part; waiting a few hours for the layers to cool and set so you can break it up into bite sized chunks. Place the pan on a very large or a couple smaller cooling racks for at least 3-4 hours or until the pan is cool, then break into pieces. The foil becomes very handy here as you can lift the whole piece out of the pan and bend to break (the foil will come away when broken) or use a knife to break into small shapes. Personally, I like using my hands as the chocolate may want to break away from the candy. Go slow and press, rather than break.

This recipe makes about 2 pounds of candy, which will keep for a couple weeks in an airtight container…if left alone that long. Not that we know what that’s like around here. Don’t take my word for it though, try making the candy that people who hate Almond Roca love, for yourself.


*Not endorsed by any particular brand or service.